RSS
Showing posts with label Paintings. Show all posts

Wednesday, August 17, 2011

Fabric painted bags.....

Fabric painting can be a fun and beautiful craft. You can use it to add designs and color to clothing including t-shirts, pants, jeans, and jackets. In addition to that you can decorate bags and totes, pillows, lamp shades, and any other fabric item you wish to add color to.

I painted a cherry blossom on the bag (free hand painting). I glued few rhine stones in the center of the flowers.
Step 1
Wash and dry your fabric. Whenever working with fabric it is a good idea to wash and dry it. This will let the fabric shrink if it is going to shrink and if the fabric contains starch, it will be removed.

Step 2
Choose your paints and painting method. You have a lot of choices when it comes to paints and painting methods these days. Each has an advantage and gives a different look.
Mixing your options-It is most fun when you can mix your options giving you a wide range of style.

Step 3
Choosing your design. You have a few options when choosing your design. You can free hand it. Another option is usage of stencils.

Step 4
Apply your design. For iron on transfer, apply your design by placing the drawn lines directly onto your fabric in the place of your choice. Gently press a hot iron on top making sure that you aren't moving the pattern (which will get you multiple pictures).

Step 5
Paint your object. Go slow while painting your piece.

Step 7
Once finished allow to dry. It is a good idea to let your piece dry at least 24 hours. It is an even better idea to give it 48 hours to make sure that it is thoroughly dry and set. After the paint is dried, iron the fabric on the reverse side carefully.

Step 8
Wash and dry. Before wearing, using, or gifting your new creation it is a good idea to wash and dry it. This will make sure everything is clean and set beforehand.

Have fun and get crafty. If you have tried painting them, then click some bright pictures and send it to me at artchitrasutra@gmail.com and i will put up your pictures on my blog.

Monday, August 15, 2011

Anniversary greeting card...

Hi everyone this a greeting card that i made for my sister's wedding anniversary. So the card looks like this......
Addition of a box is a unique feature of this greeting card

I used rhine stones, colored paper and glitter pens to draw and decorate the stems and vines aroung the flower.

To make the flower cut the shapes of petals and color them. Then arrange the flower and glue it together carefully

It is simple greeting card and i hope everyone likes it.

Monday, August 1, 2011

Make your own flutterby


Flutterby is an other name for butterfly. Defined by describing what it does, especially in the garden as it travels from flower to flower.
I believe a bu-fly is a good omen...... i wish one fine day the open air is filled with colorful bu-flies..... sitting and staring those beautiful bu-flies is so much fun..... well it is not possible to have real butterflies in your room but you can create these wonderful creatures just by painting them.
Things you will need: White handmade paper, acrylic paints,small magnets, glue, scissors and a pencil
1.Trace the patterns of butterflies on the handmadepaper and cut them carefully
2.Paint them with bright colors.... so they look natural
3.Take small magnets and glue them on to the back of bu-fly.
AND you have pretty bu-flies that you can use to hold a small note on fridge or a cupboard...... or add a small clip to the butterfly and let it cling to the curtain.
I hope you liked this tutorial...... if you have tried making them, then click some bright pictures and send it to me at artchitrasutra@gmail.com and i will put up your pictures on my blog.

Friday, July 29, 2011

Painting using cut colors!!


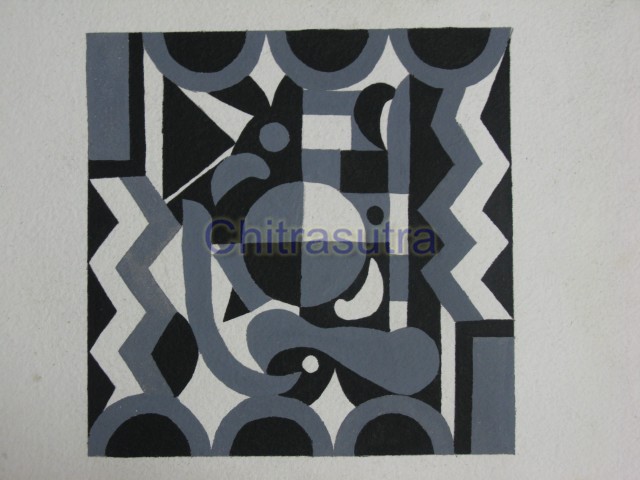
In this form of painting we divide the figure into different parts and each part is painted with single color. Painting using cut colors is very easy because you dont have to work hard, trying to produce shades in the painting.

They are more like abstract paintings and very attractive.

The first painting is a scene from the epic Ramayana, second one is a landscape and third one is an abstract painting.

The above pieces of art were done by my sister Mallika.

Sunday, July 24, 2011

Emboss painting....

I got this emboss painting kit as a gift from my lecturers and after i was done with the painting, i was extremely happy with the final output. Kavitha mam and Padmashri mam love you :)

Sunday, May 22, 2011

Landscapes


Friday, March 25, 2011

Red poppies


Red Poppies: 16 X 20 inches.
Red poppies have been used in many countries to represent sleep and death. They became a symbol specifically of the war dead after World War I, when poppies grew over the devastated battlefields after the conflict and covered the battle ground in red.

Saturday, March 12, 2011

Abstract paintings


size: 20x16 inches

size:20X16 inches

Lady holding a fruit


This painting is also called as coquette or lady holding a fruit. This is an another ravi varma painting done by me.
size: 20x16 inches

Tuesday, March 1, 2011

Ravi varma paintings done by me....


lady in the moonlight 24"x18"
Lady in the Moon Light - A classic painting with extraordinary light effects. Oil painting on canvas by Raja Ravi Varma dated 1889 - Sri Jayachama Rajendra Art Gallery, Jaganmohan Palace, Mysore, Karnataka.

Saturday, February 12, 2011

paintings for new year

water lily in a pond 16"x20"

Lord ganesha 20"x16"

A new dawn... 16"x20"


another oil... 20"x16"

Wednesday, February 9, 2011

Ravi varma paintings done by me.....


kadambari 25''x18"
A beautiful young damsel, in a relaxed state of mind, playing the Sitar in her garden.
Raja Ravi Varma ( 1848- 1906 ) is a world famous Indian painter who won the Vienna exhibition in 1873. The Painter Prince with Kshatriya blood (Indian Warrior Clan) traditionally achieved territorial conquest through the might of arms – but Ravi Varma, the Painter-Prince’s conquest was of the human heart and aesthetic perception through the might of his brush.He was a modern among traditionalists and a rationalist among moderns. He provided a vital link between the traditional Indian art and the contemporary, between the Thanjavoor School and Western Academic realism. Raja” was a title given to him in recognition of his talent. He was richly educated and, unknown to many, also a poet, painting with words as well as color.

Sunday, January 16, 2011

knife painting


Playing flute.... 12"x16"

Thursday, January 13, 2011

A pencil sketch of seascape.....


Damayanthi and hamsa ...... another ravi varma painting done by me..

Thursday, December 30, 2010

Basics of oil painting

How to oil paint:
1.Choose a place to work where there is good ventilation--a window or door can be opened, or good ventilation can be turned on, and/or you have a fairly open space where air can circulate and move around. If you paint outside, remember that you will need to set up securely so the wind won't blow things over
2.
Adjust your easel so that you can easily touch the painting surface without bending down or standing on tip-toes while holding the brush. You will stand for hours, so make sure you won't strain your back. Standing is better than sitting, but if you must sit, paint at arm's length from the easel.
3.
Put down a drop cloth, plastic bag, or tarp. Secure the edges with masking tape to keep it from bunching up or blowing away. Your work area is going to stand entirely on the drop cloth, so make sure you have covered enough area to have plenty of elbow room. If you plan on working at a table with a table easel, cover the floor below you and the table top.
4.
Set up your paints.
You need to have one container with just solvent, and the other with medium. A standard painting medium is 1 part oil to 2 parts solvent. The most common oil is linseed and its varieties.
Have enough room for your palette, brushes and palette knife, solvent and solvent/oil containers, rags and paint tubes to be comfortably displayed, readily available for you to use.
If you choose to buy a variety of paint colors, try not to get excited about squeezing every single color onto your palette before you begin to paint, as this will waste a lot of paint. Give yourself 2 or three colors to start with and go from there
5.
Paint! This part really depends on what you want to produce. However, there are certain things to keep in mind no matter what you're painting. For example, oil paints have a short blending life on the canvas. If you try to alter something and it doesn't work immediately, grab a rag and wipe it off. All the paint from that area will come off. Oils take a while to dry, so you have time to remove paint for almost 24 hours after the application.
6.
Clean your brushes well between color changes. When you are ready to remove paint from your brush and use a different color, wipe as much paint off with a rag as you can before putting the brush into the thinner. This will make your thinner last longer and will remove more paint from the brush. Swish your brush in the thinner container, then dry it off with a rag.
7.
Give your work of art its space. When the first layer is complete, it will be about 48 hours before it will be dry enough to do the second application without smearing your first day's work. Don't leave your work in an area that is especially hot, or humid, and keep it in an area where it won't get smeared, scraped, touched, brushed up against, smooshed, etc.
8.
If there is a good amount of paint left on your palette that can be used next time, use your palette knife to scrape the "good" paint together, then dampen a clean rag with thinner just slightly and wipe the rest of your palette clean. Use a piece of saran wrap to cover the leftover paint, wrapping it fairly snug.
9.
Put the lid on the thinner container and leave it until next time, regardless of how cloudy it is. When the thinner settles, the pigment in the paint goes to the bottom, and clean thinner settles on top. The next time you want to paint, you can pour the clean thinner into a clean container, wipe the pigment from the bottom, then pour the thinner back into your thinner container, ready to go.