RSS

Friday, July 29, 2011

Painting using cut colors!!


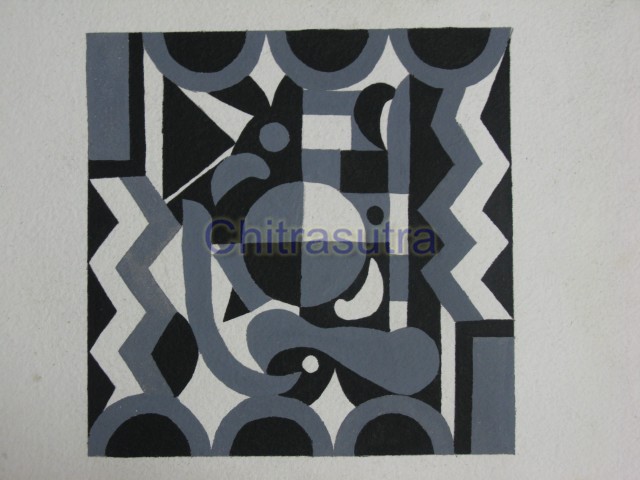
In this form of painting we divide the figure into different parts and each part is painted with single color. Painting using cut colors is very easy because you dont have to work hard, trying to produce shades in the painting.

They are more like abstract paintings and very attractive.

The first painting is a scene from the epic Ramayana, second one is a landscape and third one is an abstract painting.

The above pieces of art were done by my sister Mallika.

Wednesday, July 27, 2011

Recycle CDs into beautiful coasters!!


Do you have loads of CDs at home..... and you don't know what to do with them...... then here is an amazing way to recycle your CDs.
Transform those useless CDs into Beautiful coasters.
Use a colorful cloth or water proof patterned paper to cover the CDs on both the sides and your coasters are READY!!!
Now if you have loads of them, make sets of 6 coasters.
Tie these coasters with a satin ribbon and gift it to your family and friends.
Linking it to CraftyJC Challenge #9: Recycle and The cheerful stamp pad challenge # 25 -'Let's Reuse'

Sunday, July 24, 2011

Emboss painting....

I got this emboss painting kit as a gift from my lecturers and after i was done with the painting, i was extremely happy with the final output. Kavitha mam and Padmashri mam love you :)

Wednesday, July 20, 2011

DIY: Simple Magnetic Bookmarks


What I like about a magnetic bookmark is that it creates a sandwich around the page, and the magnet keeps the bookmark from sliding out of the book. They also make great gifts for people of all ages! I made these simple bookmarks out of handmade paper.

Here's the super easy how-to:
1.Keep in mind that your bookmarks will fold, so you need to choose a piece of card stock or other durable paper that can stand some wear. Cut a rectangle.
2.Choose an image that you like or draw your own.
3.Fold your bookmark in half--picture side up.
4.Add a magnet to each of the blank insides of your bookmark. When your bookmark is folded over a page of your book or magazine, the magnets will securely hold the bookmark in place to prevent slippage.

Linking it to Craft JC challenge # 10 simplicity

I hope you liked this tutorial...... if yes share this post with your friends. If you have tried making them, then click some bright pictures and send it to me at artchitrasutra@gmail.com and i will put up your pictures on my blog. Please feel free to drop a note! :) Thanks for stopping by!
If you are following Crafturday Creative Mess (C.C.M), then please grab the blog button and spread the word.....


Thursday, July 14, 2011

DIY:Feather pen cum bookmark

Before the invention of plastic ink pens, people used to use feathers dipped in ink to write their letters. If you are teaching children about Colonial history, you can help the kids make their own feather pens
To make these feather pens that can be used as bookmarks you will need thick paper, colors, and a refill.
1. Draw the shape of a feather on the paper and cut it out.
2.Repeat this step again so that you will have 2 such identical feathers with you.
3.Insert a refill in between both the feathers and glue the edges of both the feathers so that the refill doesn't fall off.
4.Color your feather now with bright colors.
Tada!!!! your feather pen is ready.......

I hope you liked the tutorial please post your comments